



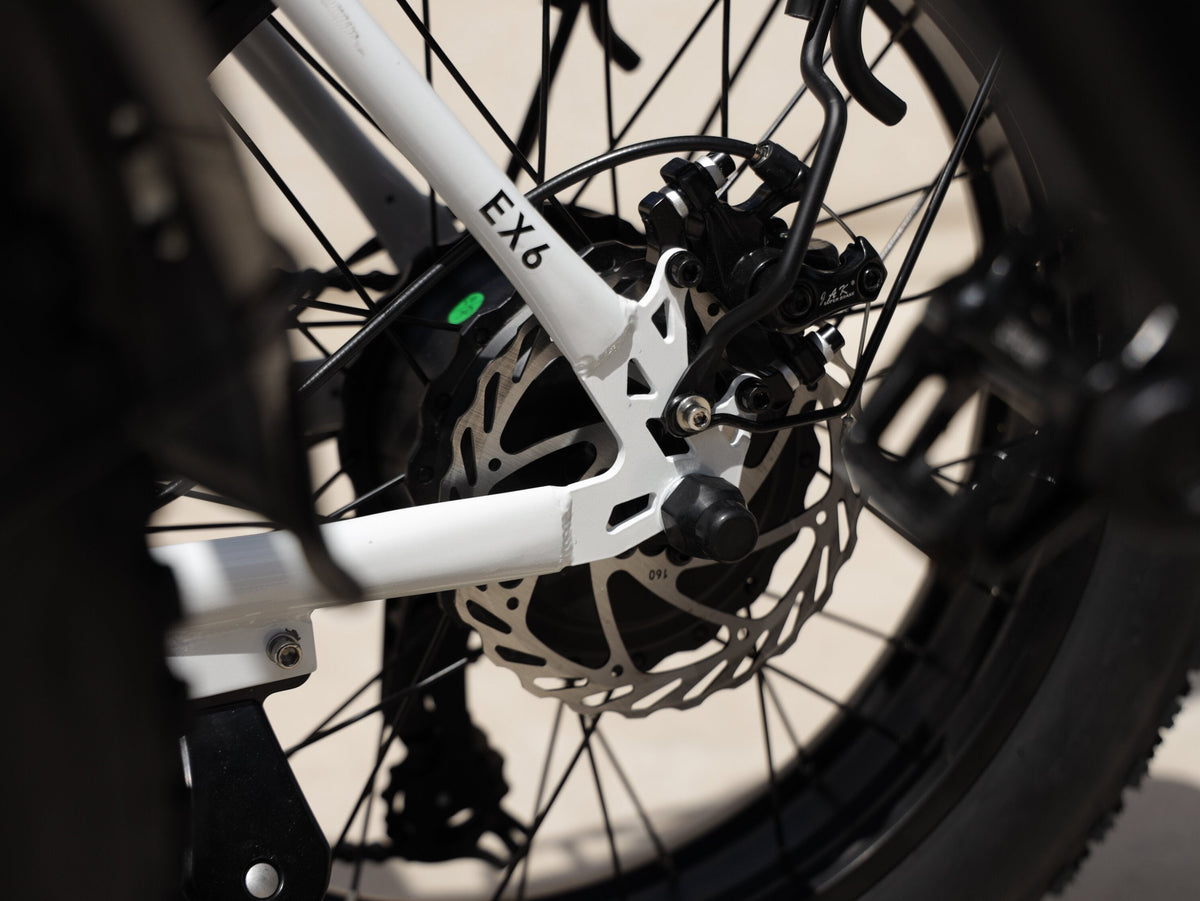
Brake pads are small components, but they have one of the biggest jobs on an e-bike: converting your speed into controlled stopping.
The difficult part is knowing when brake pads actually need to be replaced.
A squeaking brake doesn't automatically mean the pads are worn out. A brake that feels weak doesn't necessarily need new pads. Sometimes the real problem is contamination, a glazed pad surface, a misaligned caliper, a worn rotor, or a hydraulic system that needs service.
And unlike a traditional bicycle, an e-bike can put considerably more demand on its braking system because of its higher weight, speed, motor assistance, and frequent stop-and-go riding.
So instead of asking, “How many kilometres do e-bike brake pads last?”, a better question is:
What condition are my brake pads and the rest of my braking system actually in?
This guide explains the signs that your e-bike brake pads need replacing, how to inspect them, why some common brake symptoms can be misleading, and what Canadian riders should know about brake wear throughout the year.
Quick Answer: When Should You Replace E-Bike Brake Pads?
You should replace your e-bike brake pads when:
- The friction material has reached the manufacturer's minimum thickness.
- The pads are visibly worn or uneven.
- The pads are contaminated with oil, grease, or other substances and cannot be safely restored.
- The friction material is cracked, damaged, or separating from the backing plate.
- Braking performance remains poor after other potential causes have been ruled out.
- The pads have become severely glazed and replacement is the safer solution.
- The brake manufacturer specifically recommends replacement based on inspection.
There is no universal mileage interval that applies to every e-bike.
Brake-pad life depends on rider weight, terrain, speed, braking habits, weather, brake type, pad compound, cargo, and riding frequency.
For example, SRAM recommends inspecting brake pads every month and replacing them when the combined thickness of the backing plate and pad material reaches its specified minimum; its current guidance uses 3 mm total thickness for the brake systems it covers. Park Tool notes that disc-brake friction material should generally have at least 1 mm of material remaining, while emphasizing that manufacturer specifications should take priority.
The important takeaway: don't use someone else's mileage or thickness number as a universal rule. Check your brake manufacturer's specification first.

1. Don't Wait for the Brakes to Feel Terrible
One of the biggest mistakes riders make is treating brake-pad replacement as something that only needs attention when braking becomes obviously dangerous.
By that point, you may already have gone too far.
Brake pads wear gradually, so the change in braking performance can be difficult to notice from one ride to the next. You adapt to the changing feel without realizing how much braking performance you've lost.
A better approach is to inspect the pads before you notice a serious problem.
A quick visual inspection every few rides takes very little time, while SRAM recommends checking pads and rotors regularly and specifically suggests monthly pad inspections.
For an e-bike, this is especially important if you:
- Ride frequently
- Carry passengers or heavy cargo
- Ride steep hills
- Ride at higher speeds
- Commute through stop-and-go traffic
- Ride in rain or mud
- Ride on gravel or unpaved surfaces
- Use the e-bike throughout the winter
2. The Most Reliable Sign: Check the Pad Thickness
The most direct way to determine whether a brake pad is worn is to look at the amount of friction material remaining.
A disc-brake pad generally consists of two main parts:
Friction material → backing plate
The friction material is the part that presses against the rotor. The backing plate supports it.
As the brake is used, the friction material becomes thinner.
Don't confuse the backing plate with the brake pad material
This is a surprisingly common mistake.
A pad may look like it still has plenty of metal thickness, but much of that thickness may be the backing plate rather than usable friction material.
If you can see the pad clearly through the caliper, inspect the friction material itself.
If visibility is poor, consult your bike's manual or have the pad removed and measured by a qualified technician.
How thin is too thin?
There isn't one number that applies to every brake system.
Some manufacturers specify a minimum total pad + backing-plate thickness, while others specify friction-material thickness.
For example:
- Park Tool generally recommends replacing disc-brake pads when the friction material is around 1 mm or less.
- SRAM specifies replacement at 3 mm total thickness of backing plate plus friction material for the brake systems covered by its guidance.
Always follow the specification for your particular brake system.

3. Five Signs Your E-Bike Brake Pads May Need Replacing
Thickness isn't the only clue.
Here are five signs worth paying attention to.
Sign 1: The friction material is visibly thin
This is the clearest indication.
If the pad has reached the manufacturer's minimum thickness, replace it even if the brakes still seem to work.
Don't wait for metal-to-metal contact.
Sign 2: Braking performance has noticeably decreased
If you need to squeeze the brake lever harder than before to achieve the same stopping power, something has changed.
Possible causes include:
- Worn pads
- Contaminated pads
- Glazed pads
- Worn rotor
- Caliper alignment
- Cable adjustment
- Hydraulic-system issues
So reduced braking performance doesn't automatically mean “buy new pads.”
It means “inspect the braking system.”
Sign 3: The pads are contaminated
Oil and grease do not belong on the braking surface.
A contaminated brake pad can become noisy and lose braking performance even when plenty of friction material remains.
This can happen if:
- Chain lubricant gets onto the rotor
- Grease contacts the pad
- Incorrect cleaning products are used
- Hydraulic fluid leaks into the braking area
- The bike is handled carelessly during maintenance
If the friction material is significantly contaminated, replacing the pads is usually safer than trying to continue using them.
Sign 4: The friction material is cracked, damaged, or separating
Brake pads should not be used if the friction material is physically damaged.
Look for:
- Cracks
- Chipping
- Uneven separation
- Damaged backing plates
- Loose friction material
Any obvious structural damage is a replacement reason regardless of remaining thickness.

Sign 5: The pads are badly glazed
Glazing occurs when the friction surface becomes unusually smooth or hardened.
The result can be:
- Reduced bite
- Squealing
- Poor modulation
- Less consistent braking
A glazed pad isn't necessarily completely worn out, which is why this problem can be confusing.
Depending on the severity and manufacturer's recommendations, minor glazing may sometimes be addressed through proper servicing and brake bedding. Severe glazing, contamination, or uncertain pad condition is a good reason to replace the pads.
4. Squeaky Brakes Don't Automatically Mean Worn Brake Pads
This deserves its own section because “squeaky brakes = replace pads” is one of the most common oversimplifications online.
Brake noise can come from many sources.
Possible causes include:
- Dust
- Water
- Contamination
- Glazing
- Rotor vibration
- Pad compound
- Caliper alignment
- Incorrect bedding-in
- Worn components
SRAM notes that pad compound and riding conditions affect brake-pad behaviour, and that grit and grime between braking surfaces can accelerate wear.
So if your brakes squeak but the pads still have plenty of usable material, don't automatically throw them away.
First determine why they're making noise.
However, if squealing is accompanied by reduced braking performance, treat the situation more seriously and inspect the complete braking system.
5. What If the Brake Pads Look Fine but the Brakes Feel Weak?
This is where a useful brake guide should go beyond the usual advice.
Suppose you inspect the pads and discover that they still have plenty of material.
Yet your e-bike doesn't stop as confidently as it used to.
What then?

Check these possibilities:
1. Contamination
The pads or rotor may have been exposed to oil, grease, or another contaminant.
2. Glazing
The friction surface may have become polished and less effective.
3. Rotor condition
A damaged, excessively worn, contaminated, or warped rotor can affect braking.
4. Hydraulic system
Hydraulic brakes can develop problems that aren't solved by replacing pads alone.
5. Mechanical cable adjustment
On mechanical disc brakes, cable tension and caliper adjustment can affect braking performance.
6. Brake lever
An unusually soft or abnormal lever feel deserves investigation.
This is why “replace your brake pads” isn't always the right answer.
Sometimes the pads are innocent.
6. Don't Ignore the Rotor
Replacing brake pads while ignoring a damaged rotor can lead to continued braking problems.
During a brake inspection, look at the rotor as well.
Check for:
- Deep grooves
- Significant scoring
- Warping
- Heavy corrosion
- Uneven wear
- Contamination
- Excessive thinning
Rotor minimum thickness is also manufacturer-specific.
For example, SRAM specifies different minimum rotor thicknesses depending on the rotor design and lists 1.55 mm for certain 1.85 mm rotors and 1.7 mm for certain 2 mm rotors.
The lesson is simple:
Brake pads and rotors are a system. Don't inspect one while ignoring the other.
7. How Long Do E-Bike Brake Pads Last?
This is probably the most searched question, and one of the least useful questions to answer with a single number.
You may see claims that brake pads last 500 km, 1,000 km, 2,000 km, or even longer.
Those figures can all be true for different riders.
Why?
Imagine two e-bike riders:
Rider A
- Flat city roads
- Light rider
- Mostly gentle braking
- Few stops
- Dry conditions

Rider B
- Hilly terrain
- Heavy cargo
- Frequent traffic stops
- Higher speeds
- Wet and gritty conditions
Their brake pads could experience dramatically different wear despite riding the same number of kilometres.
That's why distance is a poor standalone replacement schedule.
A better approach
Think in terms of:
Distance + riding conditions + inspection
rather than:
Distance = replacement
8. Canadian Riding Conditions Can Accelerate Brake Wear
This is where the article can become much more relevant to Canadian riders than a generic global brake guide.
Canada doesn't have one single riding environment.
An e-bike used year-round in Vancouver faces very different conditions from one used on dry prairie roads or urban streets in Ontario or Quebec.
But several Canadian conditions can be particularly hard on brake components.
Rain and wet roads
Water can temporarily change braking feel and introduce contaminants onto braking surfaces.
If you regularly ride in wet weather, inspect the brake system more frequently.
Road grit
Fine grit can get between the brake pad and rotor.
SRAM specifically notes that grit and grime between braking surfaces accelerate brake-pad wear.
This is particularly relevant during shoulder seasons when roads can be dirty even when they're not visibly muddy.
Winter salt and corrosion
For riders who use an e-bike through Canadian winters, road salt and moisture create another maintenance concern.
After winter riding, inspect:
- Rotors
- Calipers
- Pad surfaces
- Fasteners
- Brake cables on mechanical systems
If corrosion or contamination is significant, have the braking system inspected before returning to regular riding.

Hills
Descending a long hill requires the brakes to convert more of your bike's kinetic energy into heat.
Repeated heavy braking can accelerate wear and increase heat.
If you regularly ride hilly routes, your brake inspection schedule should be more frequent than that of a rider who spends most of their time on flat roads.
9. Heavy E-Bikes Need More Attention to Brakes
An e-bike is not simply a traditional bicycle with a motor attached.
Many modern e-bikes are significantly heavier than conventional bicycles, particularly fat-tire and long-range models.
For example, Hiboy's EX6 weighs approximately 30 kg (66 lb) and has a maximum load of 300 lb, while the full-suspension EX11 weighs approximately 45 kg (100 lb) and supports up to 330 lb. Both use hydraulic disc brakes.
That additional mass matters.
At the same speed, a heavier system carries more kinetic energy that the brakes must dissipate when slowing down.
Add:
- Rider weight
- Cargo
- Higher speeds
- Hills
- Frequent braking
and the braking system can experience considerably more work.
This is another reason why “my friend's brake pads lasted two years” isn't a useful replacement benchmark for your e-bike.
10. Hydraulic vs. Mechanical Brakes: What Changes?
The inspection principles are similar, but the systems behave differently.
Hydraulic disc brakes
Hydraulic brakes use fluid pressure to move the brake pistons.
Many modern e-bikes use hydraulic disc brakes because they provide strong braking performance with relatively little lever effort.
Hiboy's EX6, EX9, and EX11, for example, use hydraulic disc brakes.
With hydraulic brakes, pay attention to:
- Pad thickness
- Rotor condition
- Fluid leaks
- Lever feel
- Caliper condition
- Unusual changes in braking performance
A brake lever that suddenly feels unusually soft or behaves differently should not simply be “fixed” by changing pads.

The hydraulic system may require professional service or bleeding.
Mechanical disc brakes
Mechanical disc brakes use a cable to actuate the brake.
In addition to checking pad wear, you may need to inspect:
- Cable tension
- Cable housing
- Caliper adjustment
- Lever movement
A mechanical brake that feels weak may sometimes need adjustment rather than new pads.
11. A Simple E-Bike Brake Pad Inspection You Can Do at Home
You don't need to be a professional mechanic to perform a basic visual inspection.
Step 1: Turn the e-bike off
Remove the battery if your manufacturer's instructions recommend doing so for maintenance.
Step 2: Let the brakes cool
Never inspect or touch recently heated brake components immediately after a demanding ride.
Step 3: Look through the caliper
Identify the brake pad and estimate how much friction material remains.
Step 4: Look for uneven wear
The pad should wear relatively evenly.
If one side is much thinner than the other, the problem may involve caliper alignment or another brake-system issue.
Step 5: Inspect the rotor
Look for:
- Deep grooves
- Warping
- Heavy corrosion
- Oil or grease
- Unusual wear patterns
Step 6: Check lever feel
Operate the brake lever while the bike is stationary.
It should feel consistent and predictable.
Step 7: Don't proceed if something feels wrong
If the brake lever feels abnormal, the pad is damaged, the rotor is severely worn, or braking performance is questionable, have the bike inspected before riding.
12. A Better Decision Tree: Replace the Pads or Do Something Else?
Here's a simple way to think about it.
Pads are thin → Replace them
This is the straightforward case.
Pads are contaminated → Inspect and likely replace
Don't assume contaminated friction material can safely be restored.
Pads are thick but brakes squeak → Diagnose first
Look at contamination, glazing, rotor condition, alignment, and bedding.

Pads are thick but braking is weak → Inspect the whole system
The problem may not be the pads.
Pads are unevenly worn → Find the cause
Replacing the pads without correcting the underlying problem may simply recreate the issue.
Rotor is badly damaged → Service the rotor and pads as appropriate
Don't install fresh pads against a rotor that is beyond its service limits.
Hydraulic lever feels abnormal → Stop and investigate
A pad replacement isn't a substitute for hydraulic-system service.
This decision-tree approach is much more useful than simply telling readers to replace pads every 500 or 1,000 km.
13. Should You Replace Both Brake Pads at the Same Time?
Generally, brake pads should be replaced as a matched set for the same brake caliper rather than replacing only one pad.
If one pad has worn dramatically faster than the other, however, don't simply replace both and forget about it.
Uneven wear can indicate:
- Caliper alignment problems
- Piston movement issues
- Installation problems
- Uneven rotor position
- Other mechanical issues
Fix the underlying problem as well.
And if you're replacing pads because the rotor has been changed or because you've switched to a different pad compound, check the brake manufacturer's compatibility and bedding recommendations. SRAM specifically recommends changing pads with the rotor in certain situations and performing the appropriate bed-in procedure after replacement.
14. Don't Forget Brake Bedding After Replacement
New brake pads don't necessarily deliver their best performance immediately.
They generally need a proper bed-in process so that the pad and rotor establish an appropriate contact surface.
Skipping this process can reduce braking performance and increase the likelihood of noise. SRAM specifically notes that proper bed-in improves stopping power and can reduce brake noise.
The exact procedure depends on the brake manufacturer, so follow the instructions supplied with your brake system or replacement pads.
This is especially important for an e-bike because you don't want to discover during your first emergency stop that your newly installed pads haven't been properly bedded in.
15. How to Make Your E-Bike Brake Pads Last Longer
Replacing pads is inevitable. Prematurely wearing them out isn't.
Brake progressively
Instead of repeatedly grabbing the brakes at the last moment, begin slowing earlier.
Maintain a safe following distance
More space gives you more time to slow down gradually.

Use both brakes appropriately
Using only one brake unnecessarily concentrates the workload on one part of the braking system.
Avoid dragging the brakes
Constant light braking on a long descent generates heat continuously.
Where appropriate, control speed with a combination of sensible braking and riding technique rather than keeping the brakes partially engaged throughout the entire descent.
Keep rotors clean
Avoid getting chain lubricant, grease, or other contaminants onto the braking surfaces.
Check brakes more frequently in harsh conditions
Rain, grit, mud, hills, heavy loads, and winter riding all justify more frequent inspections.
16. A Canadian E-Bike Brake Maintenance Schedule
Instead of giving every rider the same replacement interval, use a condition-based schedule.
| Check | Suggested Frequency | What to Look For |
| Brake lever feel | Before rides | Normal, consistent feel |
| Pad visual inspection | Every few rides | Thickness, uneven wear, damage |
| Rotor inspection | Every few rides | Grooves, warping, contamination |
| Detailed brake check | Monthly | Pad/rotor condition, caliper, cables |
| Wet/muddy ride inspection | After demanding rides | Grit, contamination, unusual noise |
| Winter inspection | Frequently | Salt, corrosion, contamination |
| Pad replacement | Condition-based | Minimum thickness, damage, contamination |
The key point is that frequency should increase with riding intensity and environmental exposure.
A recreational rider on dry, flat roads doesn't necessarily need the same inspection schedule as someone commuting every day through rain, winter grit, and hills.
17. When You Should Stop Riding Immediately
Brake problems aren't all equal.
Some can wait until you get home and inspect the bike.
Others mean don't ride the e-bike at all.
Stop riding if:
- The brakes don't provide reliable stopping power.
- The brake lever suddenly feels abnormal.
- A brake component is visibly damaged.
- The rotor is severely bent.
- The brake pad is damaged or separating.
- The hydraulic system is leaking.
- You hear severe grinding accompanied by poor braking.
- The brake intermittently works and then doesn't.
- The bike pulls dramatically to one side during braking.
- You cannot confidently control the bike's stopping distance.
If you're unsure whether a brake problem is safe to ride with, it's better to have it inspected.

18. The Most Important Rule: Replace Based on Condition, Not the Calendar
So, when should you replace e-bike brake pads?
Not necessarily after six months.
Not necessarily after 1,000 km.
And definitely not only when they become completely worn out.
Replace them when the friction material reaches the manufacturer's minimum thickness, becomes contaminated or damaged, or when inspection indicates that the pads can no longer provide reliable braking performance.
But don't stop at the pads.
A good brake inspection asks four questions:
- Are the pads thick enough?
- Are the pads clean and undamaged?
- Is the rotor in good condition?
- Does the entire brake system feel and perform normally?
That's a much better way to think about brake maintenance.
For Canadian e-bike riders, it also means adjusting your maintenance habits to your environment. Rain, road grit, winter salt, hills, heavier e-bikes, cargo, and frequent urban braking can all change how quickly your brake components wear.
Your brakes don't need to look worn out before they deserve your attention.
A two-minute inspection today is much better than discovering a brake problem when you need to stop.
E-Bike Brake Pad FAQ
How often should I replace e-bike brake pads?
There is no universal replacement interval. Inspect the pads regularly and replace them when they reach the manufacturer's minimum thickness, become damaged or contaminated, or no longer provide reliable braking performance.
How many kilometres do e-bike brake pads last?
It varies considerably. Rider weight, hills, speed, cargo, braking habits, weather, pad compound, and riding frequency all affect wear. Mileage should be treated as a reference rather than a replacement rule.
How do I know if my e-bike brake pads are worn?
Look through the brake caliper and check the remaining friction material. Compare it with the minimum thickness specified by the brake manufacturer. Also look for uneven wear, contamination, cracks, or other damage.
Do squeaky e-bike brakes mean I need new pads?
Not necessarily. Squeaking can be caused by water, dust, contamination, glazing, rotor vibration, alignment, pad compound, or bedding issues. Inspect the entire braking system before replacing the pads.
Can I ride with worn e-bike brake pads?
If the pads have reached or fallen below the manufacturer's minimum thickness, they should be replaced. Don't continue riding until severely worn pads are addressed.
Should I replace the brake rotor when I replace the pads?
Not always. A rotor only needs replacement when it is worn beyond its service limit, damaged, warped, heavily scored, or otherwise unsuitable. Follow the rotor manufacturer's specifications.
Are hydraulic e-bike brakes better than mechanical brakes?
Both can provide effective braking when properly maintained. Hydraulic systems generally offer strong braking performance and consistent modulation, while mechanical systems can be simpler to adjust and service. The important thing is to maintain whichever system your e-bike uses.
Why are my brake pads wearing unevenly?
Uneven wear can result from caliper alignment, piston movement, installation, rotor position, or other mechanical issues. Replacing the pads without finding the underlying cause may not solve the problem.
Do new e-bike brake pads need to be bedded in?
Yes. Follow the brake or pad manufacturer's bed-in procedure after installing new pads. Proper bedding helps establish consistent contact between the pad and rotor and can improve braking performance and reduce noise.






Partager:
Are eBikes Safe for Seniors? A Practical Guide to Safer, More Comfortable Riding in Canada